 Welcome to the Human Element Magento 2 Store Manager series where we’ll give you the down-low on all the how-tos when in M2.
For our first entry, we’re going to start really simple… so simple it’s even in the name. Today you are going to learn how to set up a simple product in Magento 2 – and it’s going to be really simple (someone stop me).
Think about the simple product as your foundational product type. Once you know how to set up one of these bad boys, you are halfway to more complex product types. Before we go much further, I think it’s important to understand what a simple product is and why you might use it.
A simple product is a physical item with a single SKU. Simple products have a variety of pricing and input controls which makes it possible to sell variations of the product. They can be used in association with grouped, bundled, and configurable products, or as their own stand alone product.
For example, let’s say you have this amazing “one-size-fits-all” color-changing t-shirt that you want to sell on your Magento 2 store. In order for a customer to purchase this t-shirt they don’t need to select a size or a color – therefore we don’t need to create a configurable product. And while we could include this incredible t-shirt with other products within a grouped or bundled product you would still want to sell this item on its own. So you create a simple product that is visible in the catalog that a user can add to the cart with very few clicks of the mouse.
To create this amazing t-shirt, or any simple product, in your Magento 2 admin start by logging in and navigating to:
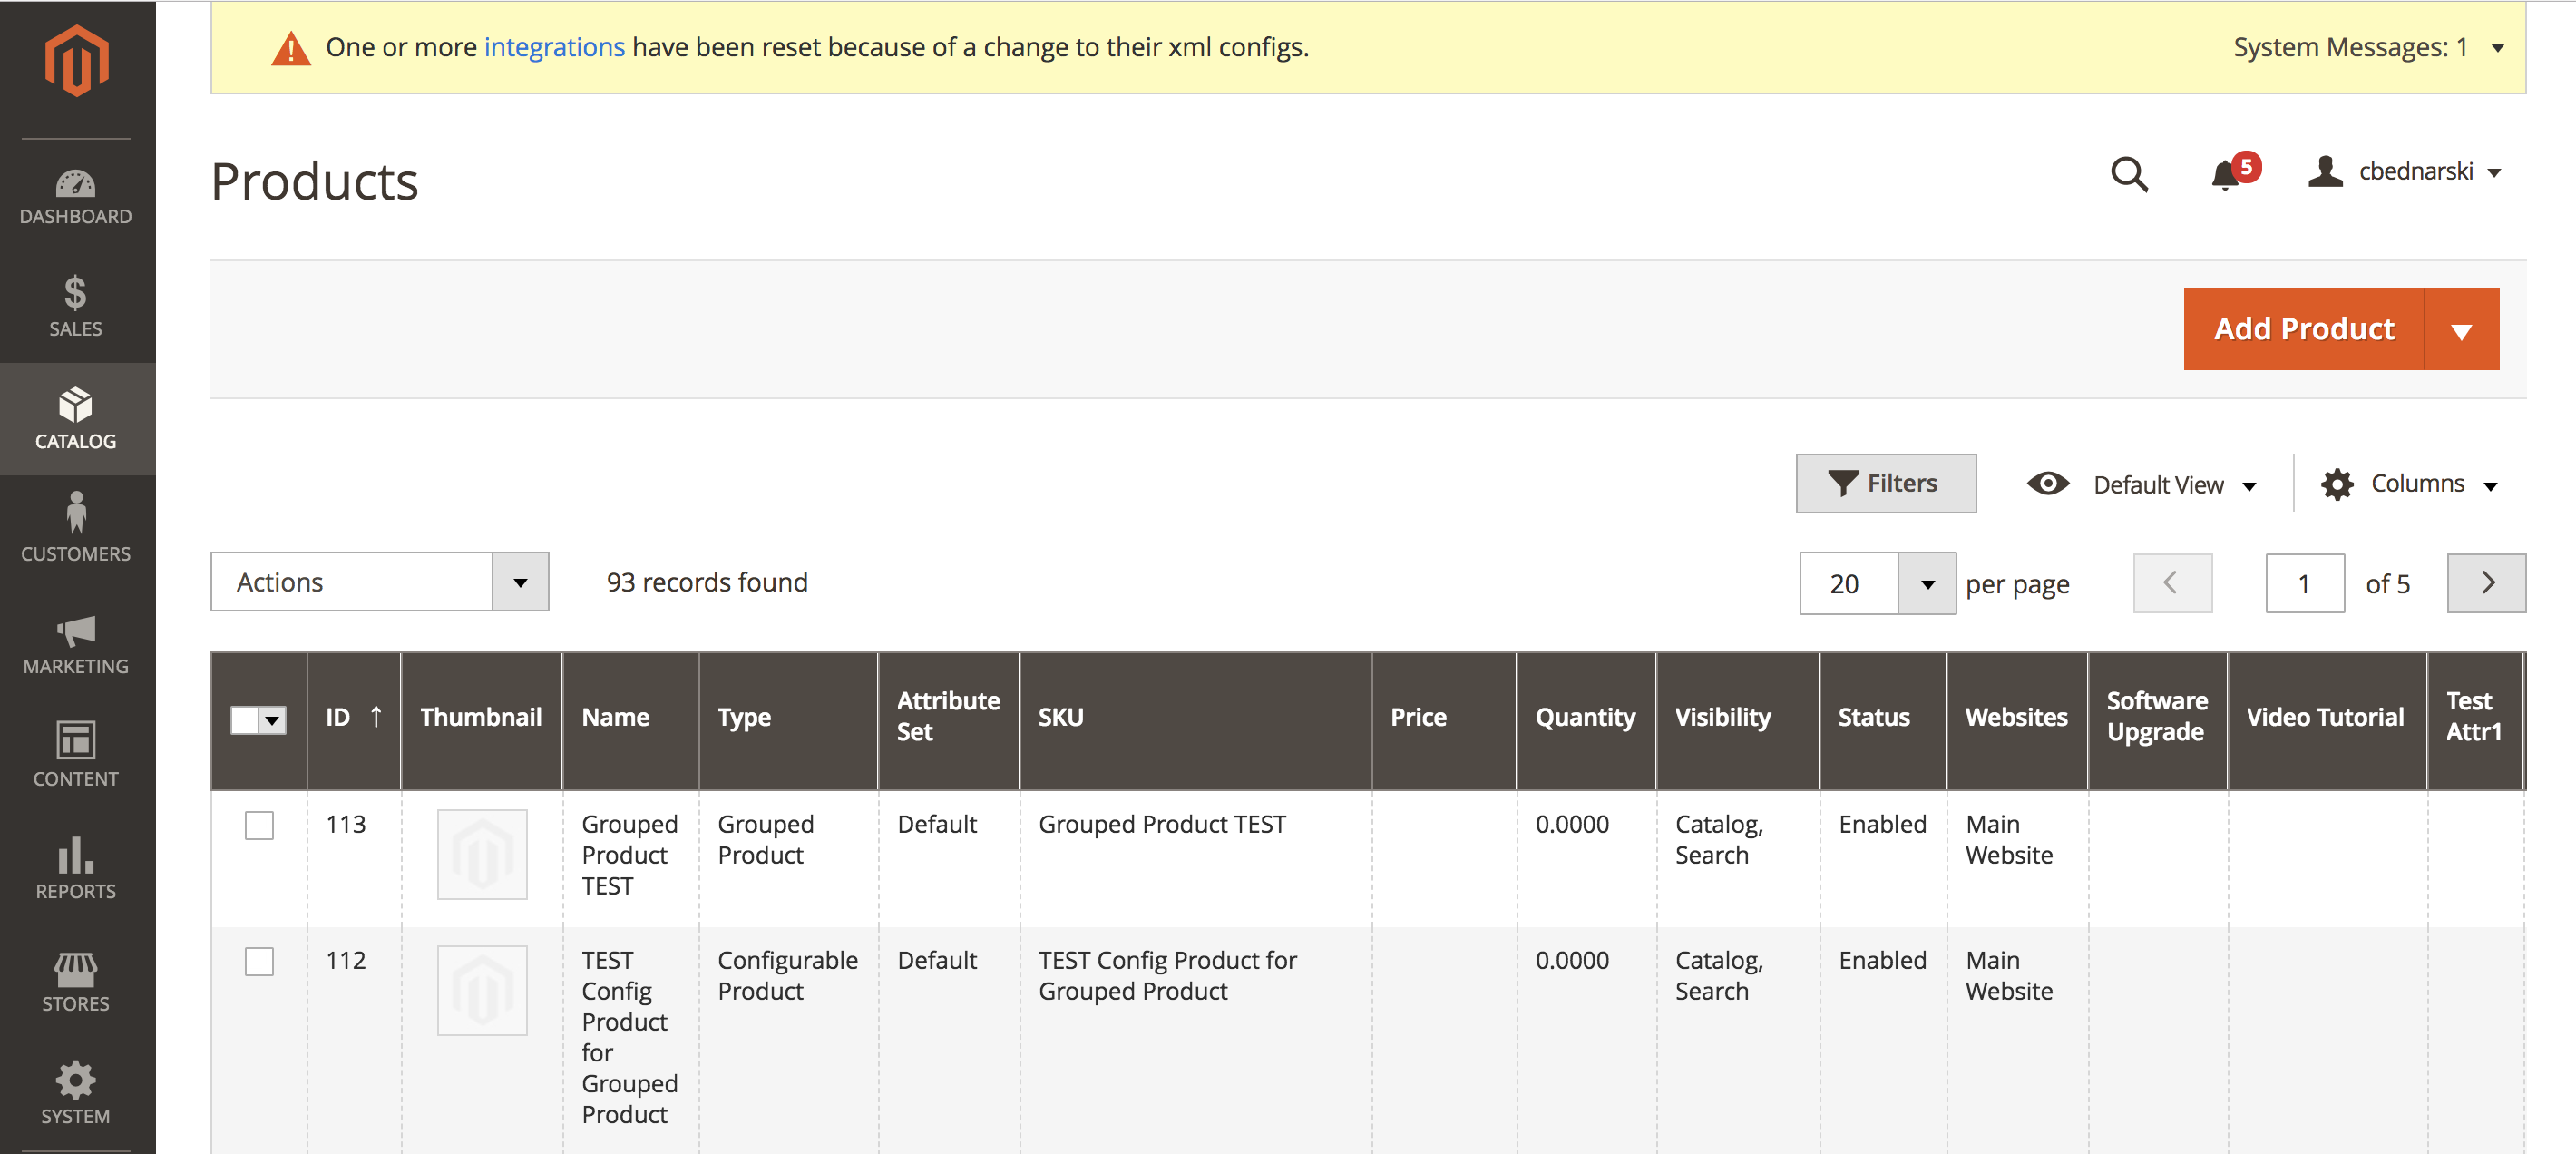
Catalog > Products
At the top of the page you’ll see an “Add Product” button. It’s big and orange. Clicking the button itself will open a page where you can start creating a simple product. Alternatively, you can click the little down arrow next to Add Product to select the product type you would like to create.
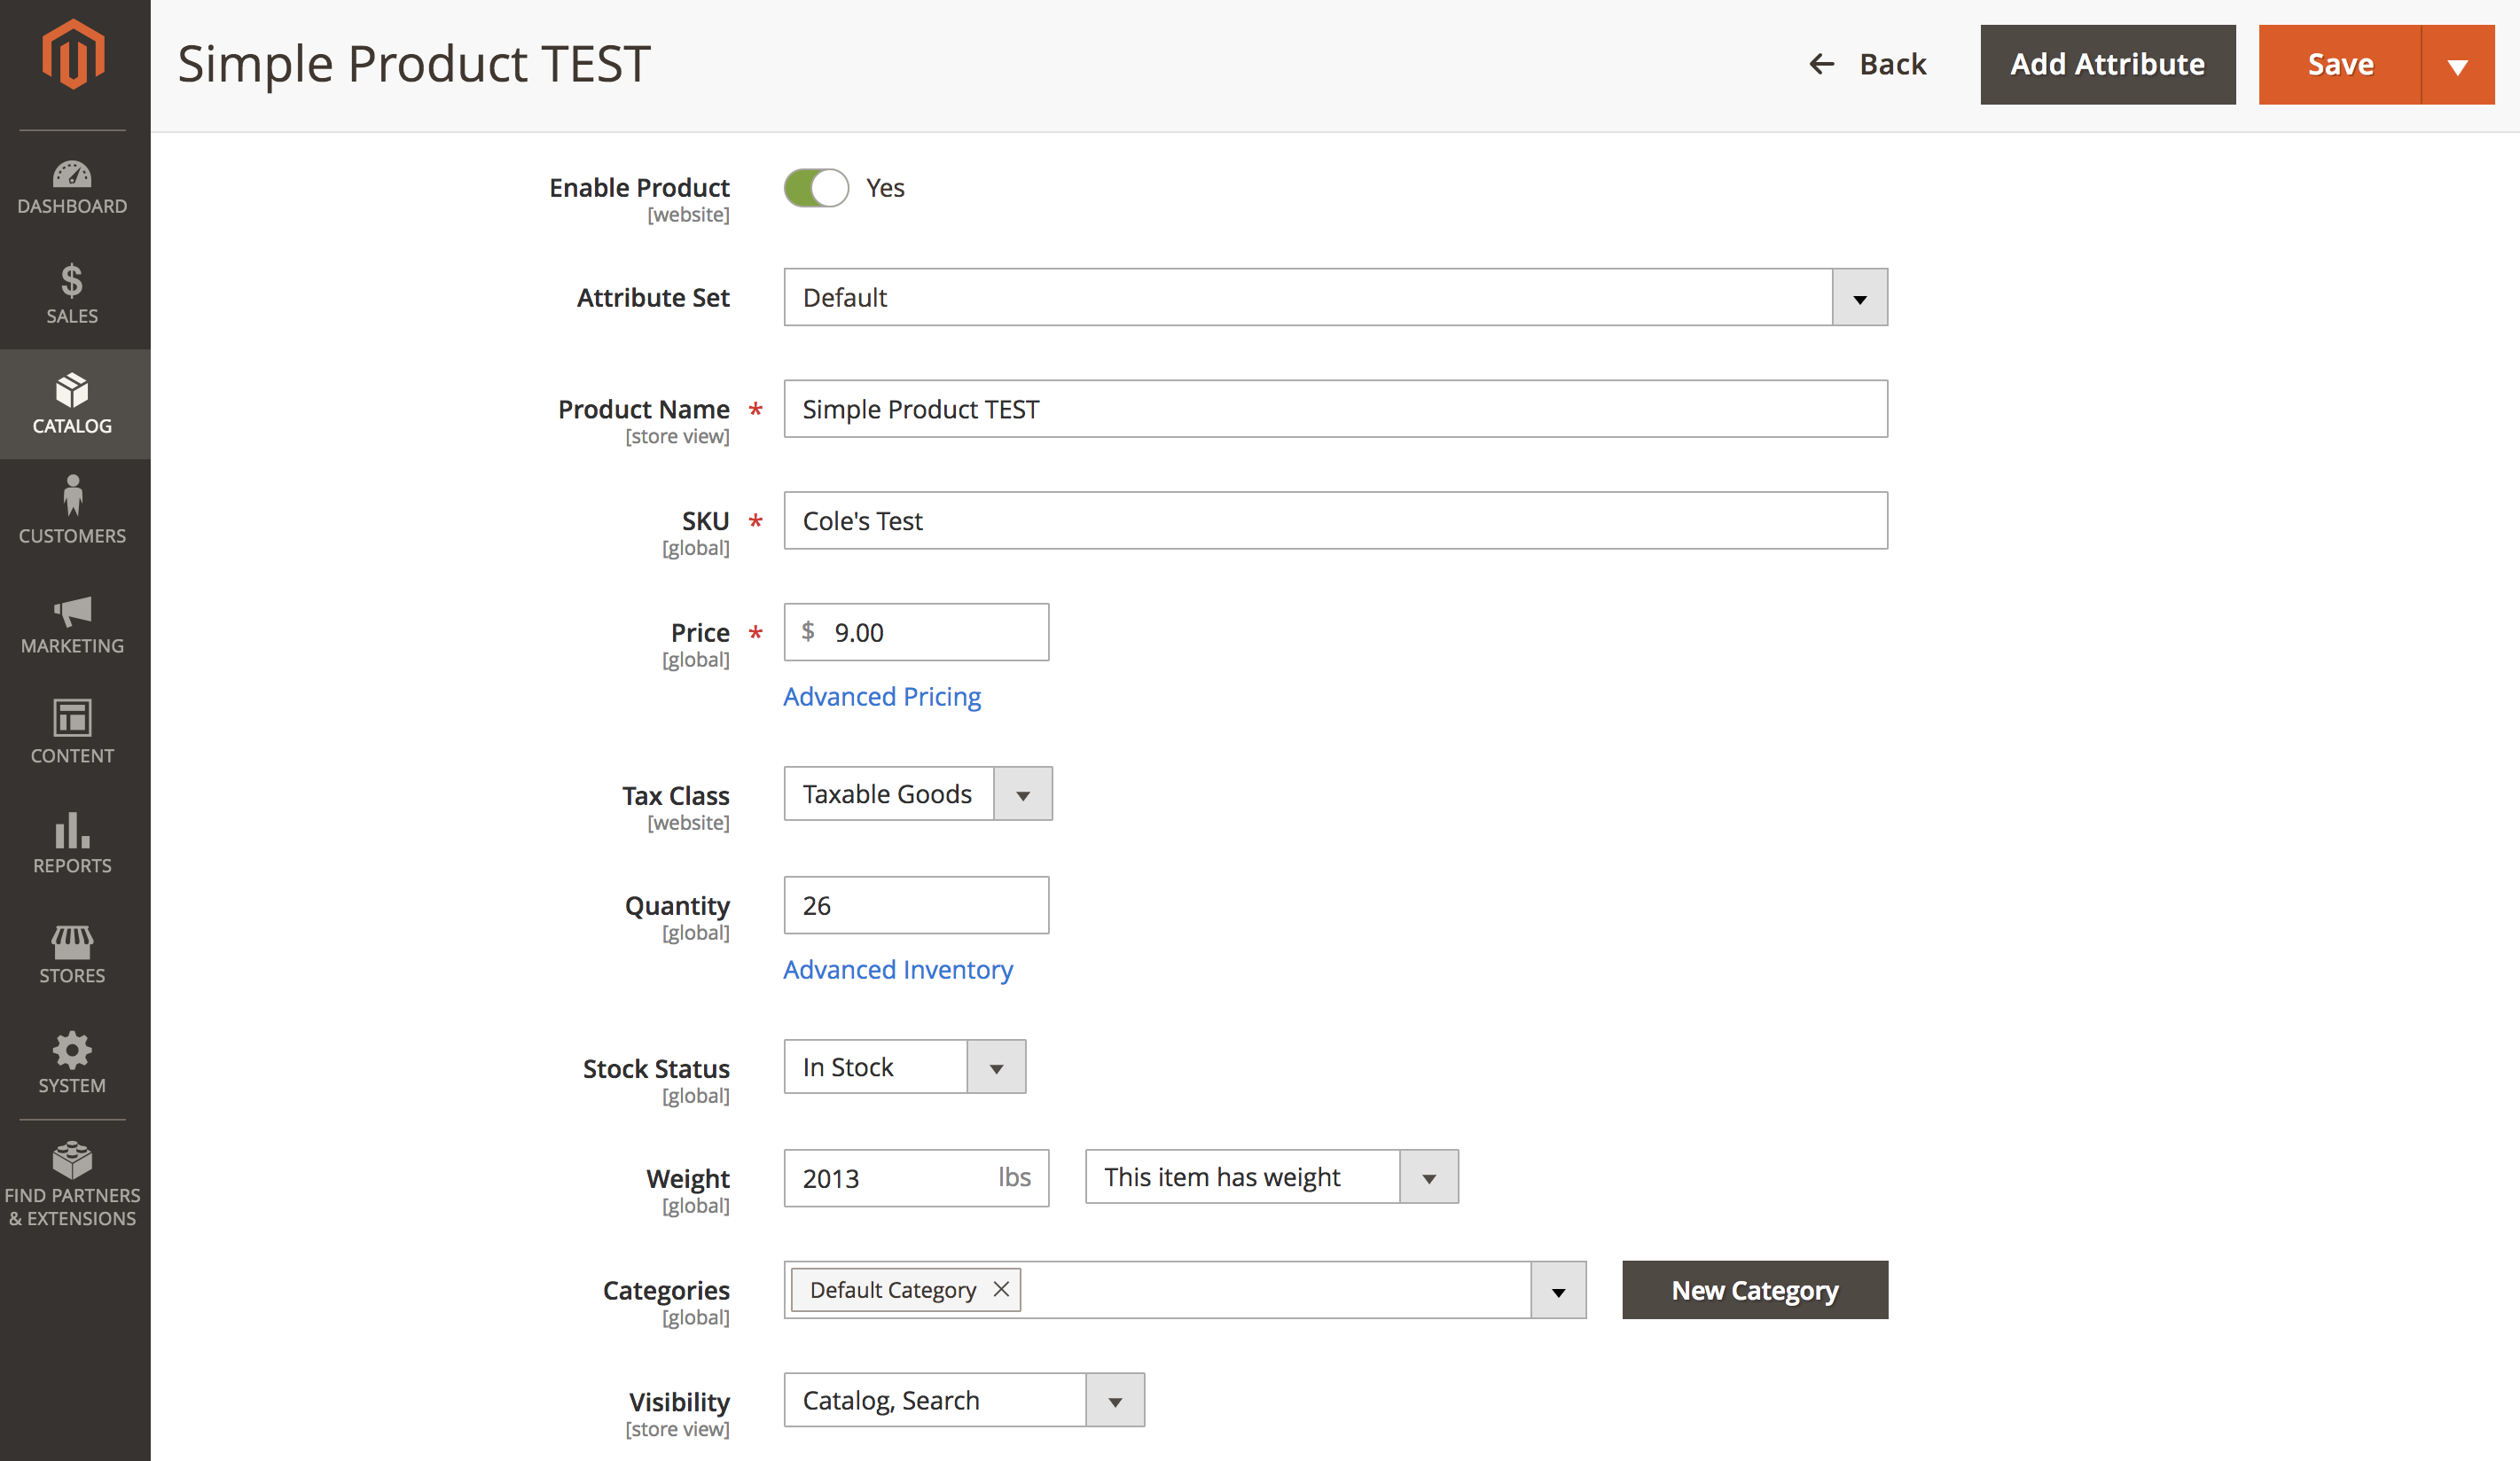
 From here there are a few required fields necessary to make the product show up in your store. Let’s start with those:
- Enable Product: This field tells Magento if you want the product active or not. Set it to “Yes”
- Attribute Set: We’ll talk more about these later – but you need to select an attribute set here. If you are unsure let’s start with “Default”
- Product Name: What do you and your customers call this product? Use a name that will be meaningful to your customers as well as searchable on your site.
- SKU: This is the unique identifier for your product in Magento. Every product should have a unique SKU. If you don’t have a SKU Magento will create one for you using the product name.
- Price: How much are users going to purchase this product for typically? There are additional settings for special and tiered pricing but we’ll talk about those later.
- Tax Class: This is where you indicate whether or not this product is taxable. The configuration for all that tax stuff is a post for another day.
- Quantity: How many of this product do you have available for sale? Put that number here.
- Stock Status: If you want the product to show up make sure this field is set to “In Stock”
- Weight: This is important for shipping. You can either set the weight OR you can tell Magento that the product has no weight so don’t worry about it.
- Visibility: This field controls how and when your product shows up on your site. You have a few options here:
- Catalog, Search: The product displays in the catalog where it has been categorized and will also display in search results. Most commonly used for stand alone simple products.
- Catalog: Product only displays in the catalog, never in search
- Search: Product is only visible when it is relevant for search results. Even if the product is categorized it will not display in the catalog.
- Not Visible Individually: Primarily used when a simple product is created to be related to a configurable or grouped parent product. The product will not show up in the catalog or in search.
- Categories: You can place your product into a category or create a new category on the fly. If the category is setup correctly, this is where you’ll see your product on the site (given your product is visible in the catalog).

By filling out these fields you are now ready to save your product and see it show up in your Magento store. Click SAVE!
Huzzah! Do you see it in your store now? You’ve made a product – but wait there’s more. Now we need to make it beau-ti-ful by adding some additional information. Go back to the admin and open up the product you just created and add in the following:
In the Content Section:
- Short Description: Typically this section of copy appears to the right of the product image. The short description should include the important details that are most relevant to a user’s need for the product.
- Description: This section of copy usually appears at the bottom of the product page in the “details” section. This is the long description of the product and should include additional copy to accompany the short product description.
In the Images and Videos section:
- Add an Image: You can select one you’ve already uploaded or upload a new one. Add as many images as you like to the media gallery. After you make a selection then you can click on the image and add Alt Text and determine where you want this image to display. Here are your options:
- Base: The first image you see on the product page.
- Small: The image you want displayed on the category page.
- Swatch: If you are creating a configurable product you can use a product image as a swatch (vs. just a color or something like that).
- Thumbnail: The image you want displayed in the cart and checkout review.
- Add a Video: A video! What is is this? The future? Yes friends, we have made it. We can now natively add videos to the media gallery. You can add videos from Vimeo or YouTube by dropping in the URL to the video. You can also use the same placement options for the videos that you can for the images. So go wild!
Now click SAVE again! Go look at that beautiful product that you just created! I’m sure it looks great. I am so proud!

There are a lot more options and settings we could utilize to really enhance this product and provide customers additional information, awesome pricing deals or allow an admin to closely manage inventory, but we’ll get into all that on another day. For now, that simple product is ready to sell!
Not sure what your next steps should be? That’s where Human Element steps in. Our team of experienced developers, designers, digital marketing strategists, and conversion optimization specialists are here to help build your brand. Feel free to get in touch and see how we can help your eCommerce business grow.


